My new regency dress. Moja nowa sukienka.


To sukienka nad którą spędzałam czas z przyjemnością. 
This dress over which I spent time with pleasure.
  
Po wcześniejszych postach można pojąc dlaczego ją uszyłam. Chciałam nauczyć się dekoracji Vandyke na różne sposoby. Najpierw musiałam się nauczyć zasad jakie panowały w krawiectwie początku XIX wieku oraz konstrukcji sukien. Wybrałam fason sukni prosty ale który mogę założyć również na bal. Preferuję zapięcia z przodu, dodałam także długie rękawy w ten sposób zyskuje się "na dwóch sukniach w jednym". Zrezygnowałam z trenu, który jest trudny do kontrolowania w czasie tańców.
Suknie szyłam z białego bawełnianego batystu w małe granatowe kropki.
Za podszewkę posłużyły mi odpadki z innych projektów. Cała suknia szyta ręcznie, bawełnianymi nićmi.

After the previous posts, you can comprehend why I made it. Wanted to learn Vandyke trimm decoration in various ways. First I had to learn the rules that prevailed in the early nineteenth century tailoring and dress design. I chose a simple dress fashion but which can also wear to the ball. 
I gave up her train, which is difficult to control during the dances.
 I prefer front fastening, long sleeves also I added in this way becomes a "two dresses in one."

Sewed dresses with white cotton batiste in a small dark blue dots. For the lining I used  cotton waste from other projects. The whole gown sewn by hand, with cotton thread.


 Mój projekt: 
An my project:


Details: 
I detale : 

Pierwsza próba dekoracji nie była udana - aplikacja jakoś nie zbyt pasowała do mojego projektu. The first attempt was not successful decoration - the application somehow not very fit for my project.
Vandyke trimm on the slevees, bodice and edgess of the dress.
Pasmanteria Vandyke'a: rekawy, dekolt oraz brzegi sukni.


Construction details:
Konstrukcja przodu:


The design of the back, a long time I could not understand how system works:
Konstrukcja tyłu, długo nie mogłam zrozumieć jak to ma "się wiązać":


Detachable long sleeves:
Doczepiane długie rękawy, z powodu braków w materiale, dosztukowywałam kawałki z resztek:


How made Vandyke trimm. Jak wykonać dekorację w stylu Van Dyck'a.


Jest wiele sposobów na jej wykonanie. Można po prosty wyciąć ząbki z innego materiału i naszyć je powstanie coś w rodzaju aplikacji. Można też ząbki obszyć kontrastową tasiemką. Ja jednak chciałam dokładnie odtworzyć ten sposób w jaki jest dekorowana halka z Muzeum narodowego w Warszawie. 
Na początku polecam wykonanie tej taśmy na papierze z większymi kwadratmi np 5cm.  

There are many ways for made Vandyke trimm. You can simply cut as aplication from different material and sew them and created . You can also cut the trimm and baste with contrasting ribbon. However, I wanted to study exactly the way it is decorated underskirt from the collection of  National Museum in Warsaw.
At the beginning I recommend to made this tape on paper 5cm. 


Na początku trzeba ustalić jakiej szerokości mają być kwadraty. Ja chciałam mieć na 2,5 cm. więc wycięłam pasek materiału na szerokość 5 cm (2,5 x 2).  Następnie złożyłam go na pół i zaprasowałam.


At the beginning you need to decide what the width to be squares. I wanted to have at 2,5 cm. So I cut the strip of material at a width of 5 cm (2.5 x 2). Then I submitted it in half and pressed them.


Na linii zaprasowania odznaczyłam najpierw na jednej stronie materiału odległości 2,5cm. Powinny z tego wyjść kwadraty. 

On the line marked hemming first on one side of the material within 2.5cm. They should come out of this squares.


Następnie na początku materiału czyli pierwszy kwadrat należy złożyć na pół i zakreślić linię. Można tez przyprasować.  
Then, at the beginning of the first square of the material that is to be folded in half and pressed line.
Dopiero od połowy pierwszego kwadratu odliczamy kolejne 2,5 cm na drugiej stronie materiału. Chodzi o to aby kwadraty były "przesunięte" o pół względem siebie, co oznacza, że kolejne kwadraty powinny zaczynać się od "środka"  kwadratów sąsiadujących. Zdjęcie następne pokazuje jak powinno to wyglądać.

It was not until the middle of the first square subtract an additional 2.5 cm on the other side of the material. The idea is that the squares were "moved" by half relative to each other, which means that the next squares should start from the "center" of neighboring squares.
Photo following shows how it should look.


Należy odciąć z pierwszego kwadratu jego połówkę. Można też to samo zrobić z drugim końcem materiału ale z przeciwnego kwadratu. Ja tego nie robię ze względu, że nie jest to konieczne.
It should be cut off from the first square of the half. One can also do the same with the second end of material, but from the opposite square. I do not do that because it is not necessary. 


Teraz trzeba ponacinać kwadraty.
Now you  can cut the squares. 


Otrzymujemy kwadraty, które następnie należy złożyć.
We receive squares that will be submitted. 


Kwadraty składamy na pół ale po jego przekątnej. Rogi powinny składać się "do środka" (wewnątrz materiału). Można rogi przyprasować żelazkiem.
Squares make in half but his diagonal. Horns should consist of inside to material and press them.


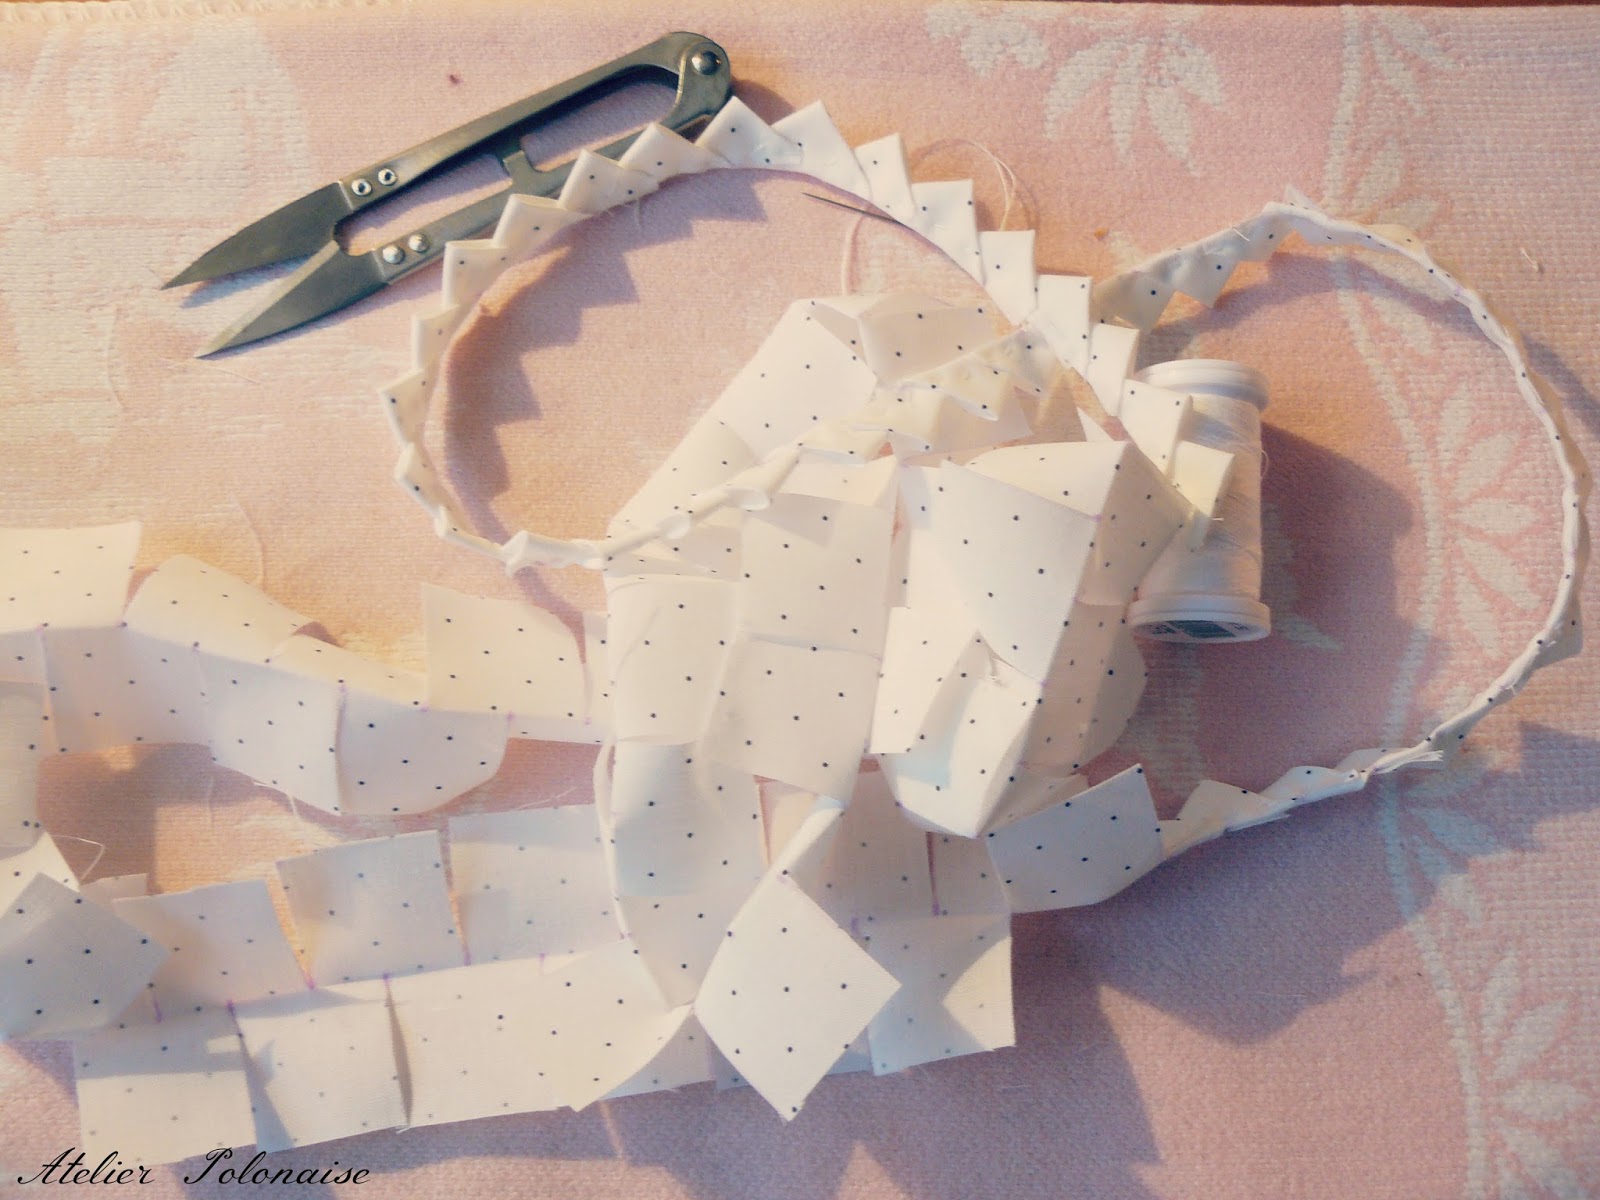
Otrzymujemy coś na wzór choinki. Teraz potrzebna jest igła z nitką. Poczynając od pierwszego złożonego na pół kwadratu należy jeszcze raz złożyć w drugą stronę. Powinien wyjść trójkąt, który należy przyszyć. 

We get something like a Christmas tree. Now you need a needle and thread. Starting from the first half of the square complex should be submitted again to the other side. He should leave the triangle, which should sew.


Następny kwadrat składamy podobnie jak pierwszy i "zawijamy" go na pierwszy trójkąt. Zawijanie trójkątów w formę taśmy jest naprzemienne.

Next we make a square like the first and "wrap" it in the first triangle. Triangles in the form of wrapping tape alternately.


Wszystkie trójkąty należy przyszywać równo i pilnować aby miały taką samą wielkość. 
All triangles must sew evenly and watch to have the same size.

When I work with these method I used some useful links: 


Mam nadzieję, że instrukcja będzie przydatna.
I Hope that the manual will be useful.